Tweaking Snap Pod to YOUR Style
Hey, editors! Wouldn’t it be amazing to hit a button and get your dream edit instantly? While no tool can read your mind (yet!), every editor has a unique style—and Snap Pod’s got the settings to match yours. Here’s a simple workflow to tweak it until it feels just right.
Time for our first AUTO EDIT.
Finding your style of podcast is an iterative process, this means Auto editing the podcast multiple times until you’ve honed in the exact style you like. SOO… to save a bunch of time, we recommend first creating a smaller test timeline, here’s how:
Here’s how:
First, Create a mini test timeline
Got a 3-hour podcast? Depending on your computer’s speed, auto-editing could take 2 to 20 minutes. Save time by testing a short chunk first. Here’s how:

Step 1: Duplicate Your Timeline

- Right click on your timeline in media pool
- Select “Duplicate Timeline” and rename it (e.g., “Test Timeline”).
- Double click to open it.
Step 2: Cut a 5-Minute Test Section
In your new timeline
- In your duplicated timeline, find a 5–10-minute segment where all speakers talk.
- Pro Tip: Use audio waveforms to spot active dialogue.
- Move the playhead to the start of your section and press Cmd + B (or Ctrl + B) to cut all tracks.
- Move to the end, cut again with Cmd + B, then delete the rest.
- Delete the rest of the footage
- Slide your test section to the timeline’s start.

Step 03 - Give it a whirl
With the timeline and Snap Pod setup, we can now give it a test.
Open Snap Pod
- Open Snap Pod:
- Go to Workspace > Workflow Integrations > Snap Pod.

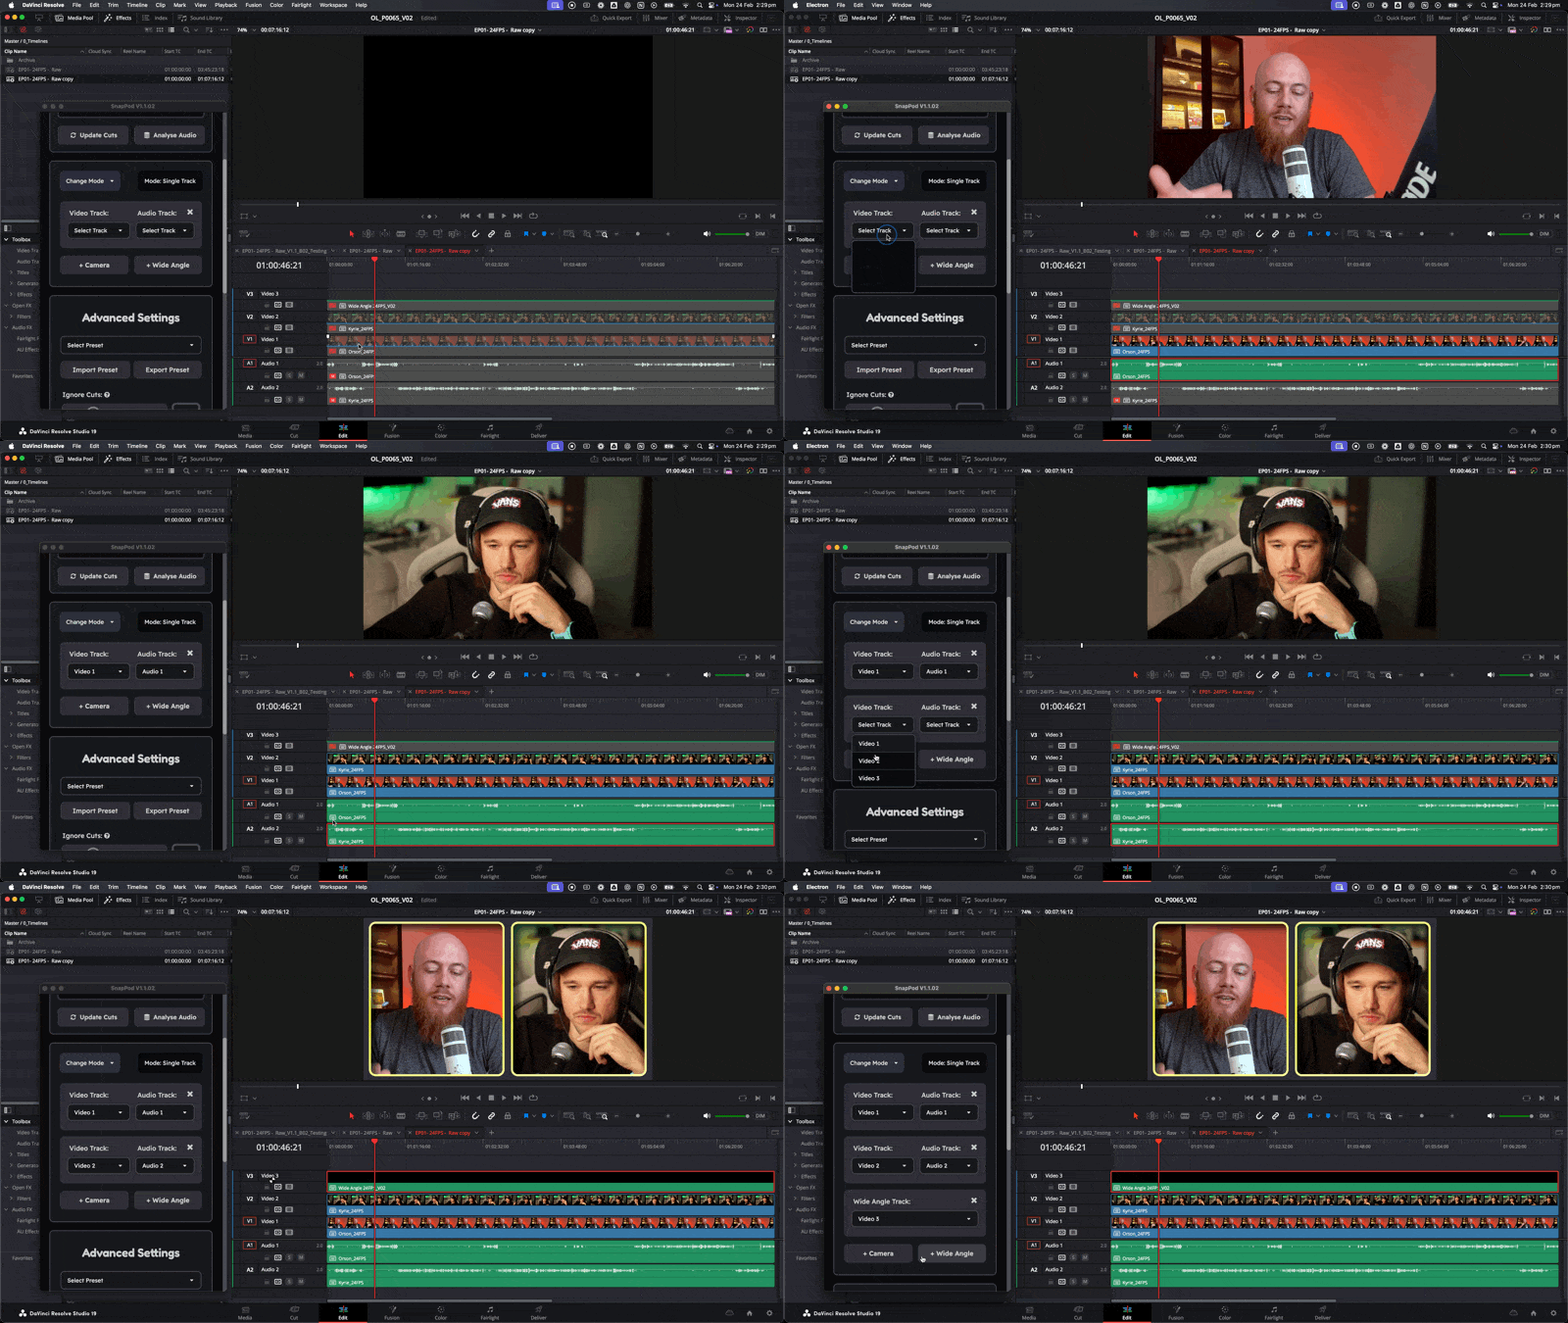
Align Audio and Video

- Assign tracks:
- Match each speaker’s audio and video tracks in Snap Pod’s settings.
- Got a wide angle? Add it and specify its track.
Click Auto Edit
- Hit Auto Edit and watch the magic happen!

How to Test Tweaks Efficiently
After this section, I’ll share a bunch of suggestions on how you can tweak Snap Pod to edit in your style… but before that…
Just so I’m not repeating “And now try Auto editing” a million times. I’m going to explain how to do it efficiently, once, here.
Step 1: Analyse Audio (only need to do this once)
Note: You’ll only have to do this step once, and the rest below can be repeated.

Once your timeline is setup:
- Click Analyse Audio
- Wait until the audio has finished rendering in the deliver page.
If you make ANY changes to the ORIGINAL audio/video, you will need to do this step again.
Step 2: Tweak a setting in Snap Pod
- Adjust one setting in Snap Pod (more on those below!).
Step 03 - Click Update Cuts

Once your changes are applied:
- Click Update Cuts—Snap Pod skips re-rendering and applies your tweak instantly.
- Check the timeline for results in seconds!
Tweak the speaker Settings
Fine Tune Cutting Between Speaker Close Ups
At it’s core, SnapPod’s most time saving feature is cutting between speakers. So we recommend experimenting with these settings first.

Too many small cuts
If Snap Pod’s jumping too often (e.g., on every “uh” or cough):
- Increase Ignore Cuts (e.g., from 1 to 1.5 seconds).
- This makes Snap Pod wait for longer speech before cutting.
Not Enough Reaction Time
Feel like cuts are too abrupt?
- Set Cut Timing to 0.2 seconds.
- This shifts cuts slightly before someone speaks, giving viewers a breather. Subtle but smooth!
Want a “Live Edit” Vibe?
For that real-time broadcast feel:
- Bump Cut Timing to +0.2 or +0.3 seconds.
- Cuts happen after someone starts talking.
Quiet Speaker Ignored?
If Snap Pod skips a soft-spoken guest:
- Lower the Noise Floor in the Preferences menu to catch quieter audio.
- Test small adjustments until it picks them up.
Stuck on One Speaker During Silence?
If Snap Pod keeps cutting to someone when no one’s talking:
- Check their audio track for loud background noise (e.g., hums or breathing).
- Raise the Noise Floor above that level to filter it out.

Play with Wide Angle Settings
Wide shots make your podcast feel like a lively chat, not just talking heads. Here’s how to control them:
High = Try and place a wide angle every 15 seconds
Medium = Try and place a wide angle every 30 seconds
Low = Try and place a wide angle every 60 seconds

Future Update Plans
We’re working on more wide-angle control, like:
- If two people are speaking over each other
- Forcing Wide angles to appear at least every X amount of time
- And more
We’ll let you know, as soon as these features are ready for testing via our email updates.
Fine-Tune with Markers
Our markers feature is especially useful for reviewing your footage quickly, it’s basically SnapPod’s way of saying
“Hey! There’s a bit of stuff happening here that’s not usual, you should pay special attention when reviewing the edit.”

Adjust Marker Sensitivity
So when Snap Pod leaves markers, it takes into special consideration your preferred style in the settings. This simply means it will leave more or less markers based on what you want. Here’s some helpful tips to tweak it more accurately.

Too many markers
Too Many Markers? Could be:
- Guests talking over each other a lot.
- Noise Floor too low (picking up faint sounds).
- Ignore Cuts off-balance (too high or low).
Fix: Tweak Noise Floor and Ignore Cuts until markers feel just right.