
Adjustment Clips and Non Destructive Editing - Step by Step Guide
What You Will Learn
Learning from online tutorials is great—but they often miss the skills that truly set professionals apart.
This article (and its accompanying video) is my attempt to bridge one of those gaps, - by focusing on one of the most overlooked yet essential editing techniques:
👉 Non destructive editing 👈
Non-destructive editing is all about working efficiently without locking yourself into choices you can’t undo. It saves time while keeping you creatively flexible.
It’s not something you can ✌️simply understand✌️—you have to practice it. That’s why it’s rarely covered in typical online tutorials.
What you’re going to learn:
In this guide, we’ll hit two birds with one stone:
- How professionals use adjustment clips.
- How to apply them in a non-destructive editing workflow
The video covers the core concepts, while this article walks you through a step-by-step challenge to help you practice and apply them.
What you’ll need:
- Magic Zoom (optional)
Plugin/Templates You’ll Need
Disclaimer: Some paid product links may be affiliate links at no extra cost to you. Buying through these links helps us keep writing articles like this.
For this tutorial, you don’t need to pay for Magic Animate—but if you value your time, it’s absolutely worth it!
Magic Animate (Free)

Optional - Magic Zoom (Paid)
Practice Project
Download the practice project here:
Tutorial Overview Video
First things first, I recommend watching this video in its entirety, then coming back to practice.
Practice Challenge 1
GOAL: Your objective is to create this shaky clip with a figure sliding in.
Challenge: Unlike beginner editors, use adjustment clips to keep the edit non-destructive.

- Opening open the timeline named V1_Practice

Add an adjustment clip to timeline
- Go to Effects tab → search Adjustment Clip
- Drag the Adjustment Clip on top of the two images on the timeline

Apply the camera shake to the adjustment clip

- Grab Camera Shake from:
- drag it onto the adjustment clip
Effects → Open FX
Quick tip: If you can’t drag the camera shake on the adjustment clip. You’re using the wrong one.


You should now have some “shaky footage”

Apply the camera zoom to the adjustment clip
- Grab Magic Zoom from the Effects tab and drag it onto the adjustment clip
- Adjust Zoom Amount/Zoom Scale to your liking
- ALTERNATIVELY, if you don’t have have Magic Zoom, grab Magic Animate from the Effects tab again, drag it onto the adjustment clip.
- In the Inspector → Effects → Magic Animate, scroll down to Zoom Control → Check Zoom In and Zoom Out.
- Set the Zoom Starting point (in) to 1.0
Set the Resting Destination to 1.4
Zoom Ending Point (out) to 1.0

Animate the character individually
Because this animation should only apply to one clip, we should apply the effect to JUST the one clip and not the adjustment clip!
- Grab Magic Animate from the Effects tab and this time, drag it onto the clip named Figure


- Highlight the Figure clip by clicking on it. In the Inspector → Effects → Magic Animate, scroll down to Whip Control → Check Whip In and Whip Out
OH NO 🛑
A client has requested a change, they want the character to come in half a second later.
Thankfully, since you’re using adjustment clips, this is a super quick 1 step thing
- Shorten the duration of the clip Figure, so that the whip in animation kicks in a bit later

If you’re not sure how this is saving time, I recommend watching the first part of my video again where I compare how a beginner vs a pro handles the client request.
And we’re done! Congratulations - You should now have the same looking video as the goal.
Practice Challenge 2
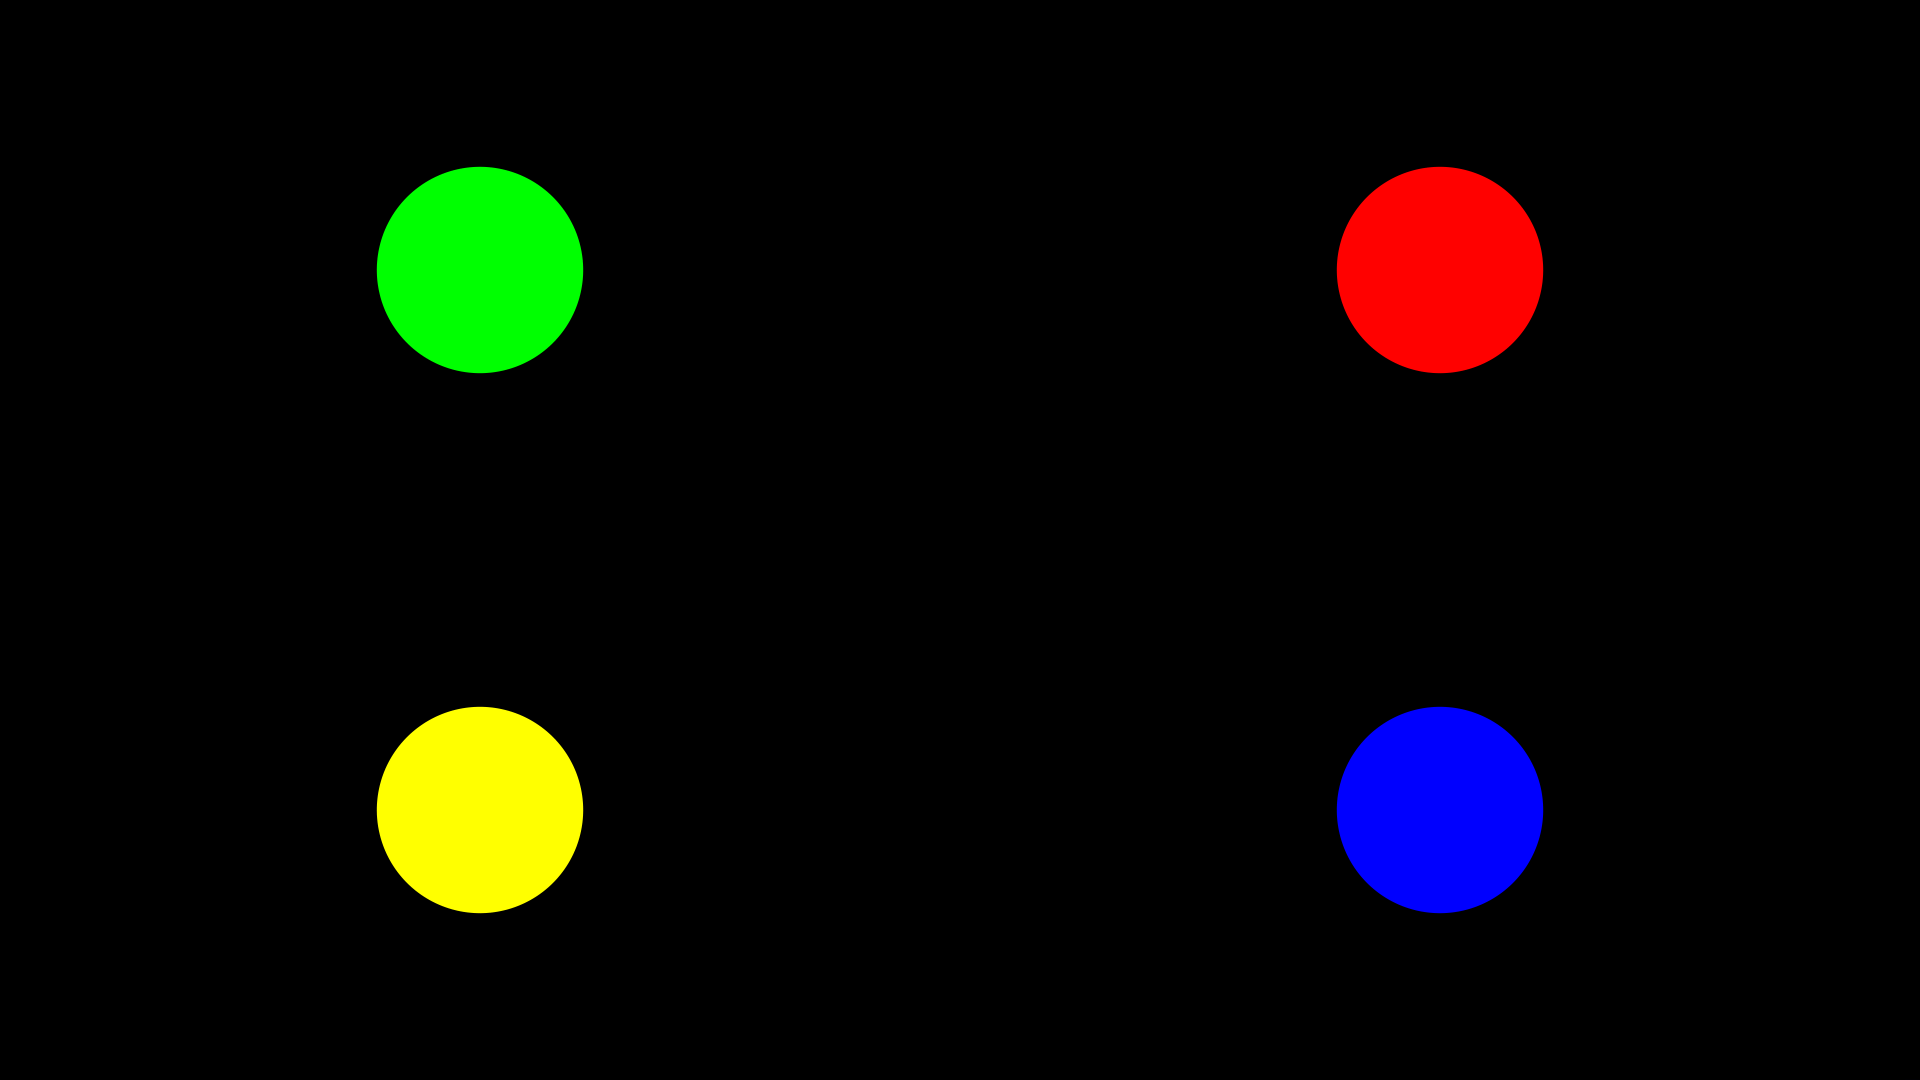
Goal: Zoom into the balls in the image one by one, at the exact moment the same coloured marker is on the timeline.

Challenge: The client will ask for a change, so it’s important you keep this edit non-destructive (don’t worry, our guide will keep it this way 😉).
Before
After

Open the timeline named V2_Practice

First, let’s zoom into the yellow ball:
- Go to Effects and search Adjustment Clip
- Drop an adjustment clip above the fusion composition

- Grab Magic Animate from the Effects tab and drag it onto the adjustment clip

- Select the adjustment clip by clicking on it
- In the Inspector → Effects → Magic Animate, scroll down to Zoom Control → Check Zoom In and Zoom Out.
- Change the Zoom Starting Point to 1
Change the Resting Destination to 2
Change the Zoom Ending Point to 1

Bonus Trick
Where about to get into timing these animations.
To make this super SUPER EASY and QUICK, you can add a visual cue marker to the adjustment clip to help you visually see where the in-animation stops.

But to do this, we first need to find out what the animation length is:
How to find the animation length setting for Magic Animate
You can check the animation length of magic animate by going to:
- The adjustment clip with magic animate.
- In the Zoom Controls:
- scroll down to Anim Length (Secs).
Here, we can see the animation is 1 second long, this is what we’ll be using for the tutorial.


Add a marker to match the animation length.
Since we know this animation is one second long, all we have to do is move the playhead one second ahead and add a marker to the clip. Here’s how:
At the beginning of the clip:
- Press shift, right arrow key
- Select the adjustment clip
- Press the m key
This will move the playhead exactly 1 second ahead.
This should add a marker directly on the clip.

Here’s a quick test to make sure it’s working right
Now if you play this adjustment clip, you’ll see it stops bang on the marker
Note: Because of the animation easing, it may look like it stops a few frames early, don’t worry it hasn’t.
Timing the animations
With the markers out the way, it’s now super easy to time these animations to land exactly on the markers.
- Line up the marker on the adjustment clip to the yellow marker


- In Inspector → Magic Animate → Main Animations → Zoom Control, adjust the Pivot to center the viewer to the yellow ball (X = 0, Y = 0)
- Adjust the length of the adjustment clip

You should get this:

Next, let’s zoom into the other colors:
This is super easy to duplicate across the other circles:
- Click on the adjustment clip
- HOLD Alt/Option and drag it over to the next marker,
- Lining up the marker on the adjustment clip with the next colored marker.


RED: X = 1, Y = 1 BLUE: X = 1, Y = 0 GREEN: X = 0, Y = 1
- Keep duplicating the clips and adjusting the Magic Animate Zoom Control Pivot settings to apply the zoom to the other colors
Your results should look like this:
OH 🤬! Client requested another change!
A client has requested a change, they hate the zoom out! “Can you just keep it zoomed in, it shouldn’t be hard change”…
Thankfully, since you’re using adjustment clips, this is easy as to do!
Apply Dynamic Pivot
We can create a more dynamic animation with a simple tweak
- Move the first adjustment clip to the layer above


- Extend the end of the first adjustment clip to line up with the marker on the second adjustment clip
- Repeat for the other clips

You should get the same result as the clip in the After section above
Before
After
This is just the start
Congratulations! You just got your first taste in non-destructive editing! Give yourself a pat on the back!
This is just the beginning in becoming a professional editor, there’s so many skills and techniques to learn, 13 years in, I’m still learning incredible workflows from other editors.